Metallographic Workflow for Steels and Ferrous Metals
May 14, 2019
Additive manufacturing is a focus area for many 3D data gathering experiments. This recipe evaluates an additively manufactured 17-4 PH steel sample for microstructure, porosity, and other additive manufacturing process defects. Follow this step-by-step workflow to analyze your steels and ferrous metals with Robo-Met.3D®.
Read also: UES Hosting Local Event for Material Analysis Solutions in Industry
1. Mounting
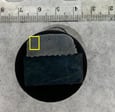 The sample is conventionally hot mounted. The additive manufacturing build area and the substrate (left image) are clearly visible. The imaging area is highlighted in yellow in this image.
2. Metallographic Workflow
Most workflows can be divided into a planarizing step that is not repeated, and grinding/polishing steps for material removal and surface smoothing. In this case, we used a 70µ Dia-Grid Diamond Disk for planarization. In other cases, we have used finer (30µ or 15µ) disks for this purpose. The finer grit disks are useful for samples with smaller cross section or more delicate structures such as composites.
1) Grinding 1 Step
- Pad/Cloth/Disc: Struers MD-Largo composite disk
- Medium: 6µ diamond
- Time/RPM: 20s/150 RPM
2) Polishing 1 Step
- Pad/Cloth/Disc: Struers MD-Dac woven acetate pad
- Medium: 6µ diamond
- Time/RPM: 20s/150 RPM
3) Polishing 2 Step
- Pad/Cloth/Disc: Struers MD-Dac woven acetate pad
- Medium: 3µ diamond
- Time/RPM: 60s/150 RPM
4) Polishing 3 Step
- Pad/Cloth/Disc: Struers MD-Dur woven silk cloth
- Medium: 1µ diamond
- Time/RPM: 90s/150 RPM
5) Cleaning 1 Step
- Pad/Cloth/Disc: Struers MD-Chem Polishing Cloth
- Medium: Water
- Time/RPM: 10s/150 RPM
Other Parameters:
- Prelube 10s
- Dispense Time On 3s / Off 30s
- Rinse 10s
- Air Dry 10s
Maintaining moisture on the pads is essential to successful automated metallography. The final on-pad cleaning step provides a better imaging surface.
3. Etching
Etching can be a very valuable adjunct for three-dimensional microstructural investigations. We screen etchants for suitability for use with the immersion technique and stability for the period of the run, as well as suitability for use with the material being investigated.
We evaluated both Waterless Kalling’s and Fry’s etchants with this material. Etching with Fry’s Reagent gave us a well-delineated, predominantly martensitic structure. It also revealed that the lack of fusion defects could be associated with microstructural features. Using one of the three dip wells on the system for neutralization maintains safe operational protocols.
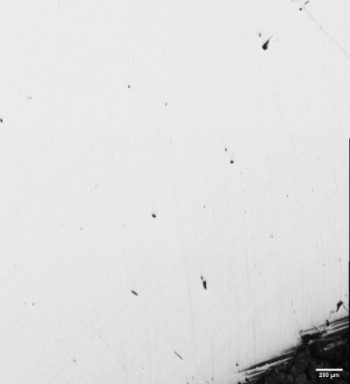
Unetched image, at 100x |
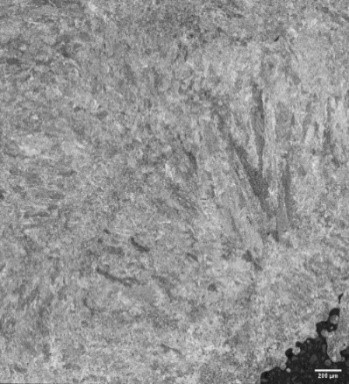
Waterless Kalling’s etch, at 100x |
.jpg)
Fry’s Reagent etch, at 100x |
4. Sectioning Results
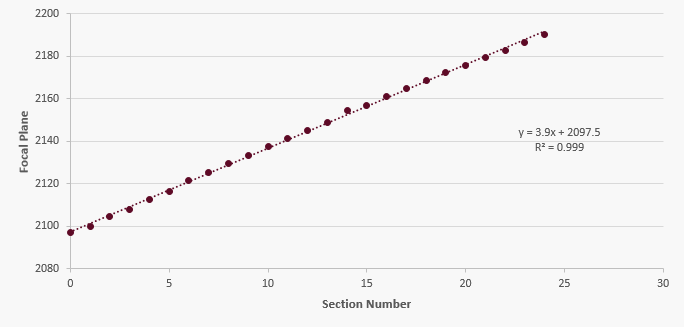 This workflow provided a linear material removal of about 4µ per polishing step, with a standard deviation of about 0.6µ, over 25 sections. The removal results (focal plane of section versus section number) are plotted on the left figure, which demonstrates a highly linear material removal for etched AM 17-4 PH sample. This provides essential input into our 3D reconstruction models.
5. For Further Information
The wide variety of materials that we analyze for clients has given us extensive experience in developing workflows suited to materials such as aerospace alloys and polymer and ceramic matrix composites, among others. Contact us to jump-start your utilization of Robo-Met. We’ll be happy to consult with you to create a custom workflow to characterize your materials.

